Creating checklists
Todo 7 can be used to keep simple checklists. A checklist is a collection of individual items. A checklist can have its own complete set of details; however, its individual items do not have separate details.
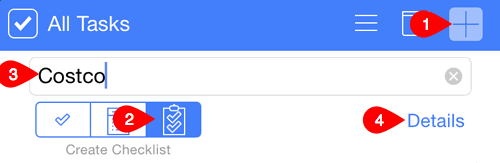
Create a new checklist
- Tap the plus sign on the task (right) side of the screen.
- Verify/tap the Create Checklist icon (clipboard with two checks) on the right of the task options.
- Enter checklist name in New Checklist field.
- Tap Details to open the Checklist Details screen.
- Enter the name of the checklist item.
- Tap Return on the keyboard.
- Repeat steps 5-6 for each checklist item.
- Tap the checklist name at the top of the checklist screen to return to the current list of tasks.
GIVE IT A TRY!
- Add a sample checklist that can be modified and deleted as you progress through this lesson.
Create checklist sequence
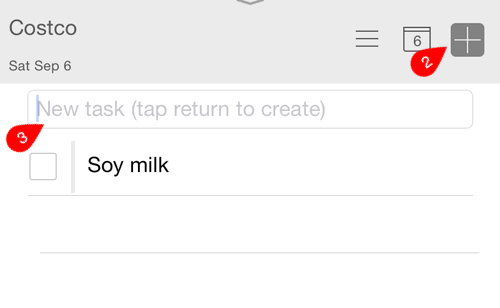
Adding items to a checklist
Once a checklist is created, individual items can be added to the checklist.
Add items to a checklist
- Tap the Checklist reference.
- Tap the plus sign.
- Enter an item name in New Task field and press Enter.
- Repeat above step until all items are entered.
GIVE IT A TRY!
- Add several items to the checklist.
Add checklist items screen
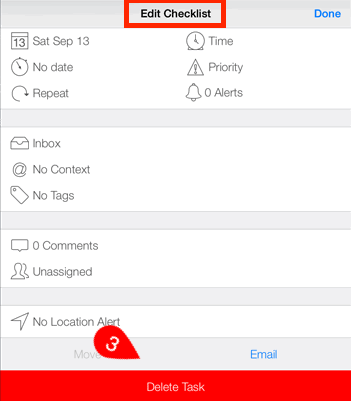
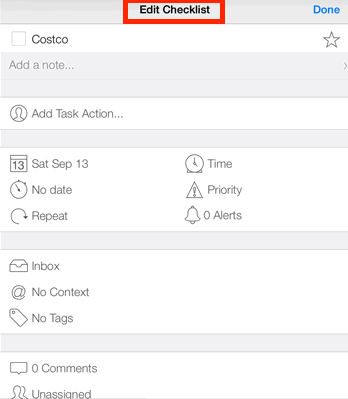
Editing checklist details
Todo 7 checklist details can be edited, such as notes associated with the checklist, etc.
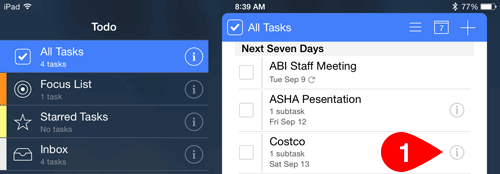
Edit checklist details
- Tap the information icon to the right of the name of the to-be-edited checklist.
- Tap the field(s) to be changed.
- Modify the information.
- Tap Done.
GIVE IT A TRY!
- Edit some of the sample checklist details you entered previously.
Checklist information icon
Edit checklist screen
Editing a checklist item
Todo 7 checklist details can be edited when new information becomes available or checklist information changes.
Edit a checklist item
- Tap the checklist to be edited.
- Tap the checklist item to be changed.
- Modify the information.
- Tap Save.
GIVE IT A TRY!
- Edit some of the sample checklist items you entered previously.
Edit checklist item screen

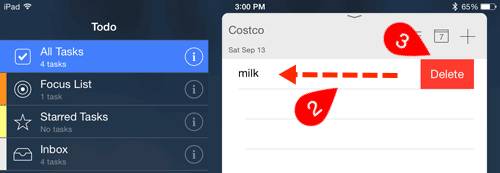
Deleting checklist items
There may come a time that you want to delete a checklist item (e.g., if you no longer need to do that item).
Delete a checklist item
- Tap the desired checklist reference to open the checklist.
- Tap the desired checklist item and slide from right to left.
- Tap Delete. Note you will not be asked to confirm the deletion and all tasks within the project will be deleted.
GIVE IT A TRY!
- Delete some of the sample checklist items you entered previously.
Delete checklist item
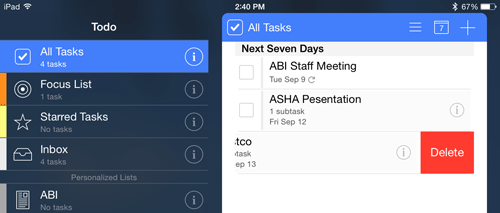
Deleting a checklist
There may come a time that you want to delete a checklist (e.g., if you no longer need to do that checklist).
Delete a checklist
- Tap the desired checklist reference and slide from right to left.
- Tap Delete. Note you will not be asked to confirm the deletion and all tasks within the project will be deleted.
OR
- Tap the information icon associated with the desired project to open it.
- Scroll to the bottom of the Edit Checklist screen.
- Tap Delete Task. Note you will not be asked to confirm the deletion.
GIVE IT A TRY!
- Delete the entire sample checklist you entered previously.
TROUBLESHOOTING
Problem: I added a task but it should be a checklist.
Solution: Tap and hold the task and select the Checklist option.
Slide to delete checklist option
Delete checklist edit checklist screen option