Selecting categories
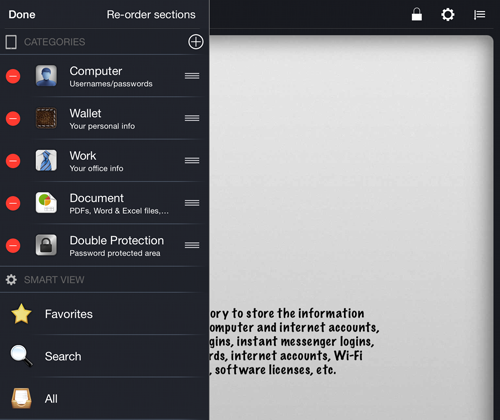
OneSafe allows you to file your password information into categories. This can be very useful when trying to organize your passwords. Default categories include:
- Computer — Usernames and passwords
- Wallet — Personal information
- Work — Work-related information
- Document — Files and documents
- Double Protection — A second password-protected area
- Favorites — Quick reference to information identified as a favorite
- Search — Quick search view to find passwords
- All — All information regardless of category used
Choose a category
- If the Categories list is visible on the left side of the screen, choose a category by tapping its name.
- If the Categories list is not currently visible, tap the name of the active category in the upper left corner of the toolbar. When the Categories list appears, tap the desired category.
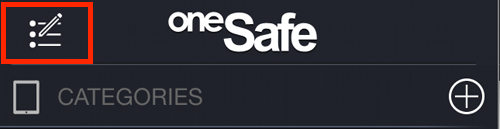
oneSafe Categories list
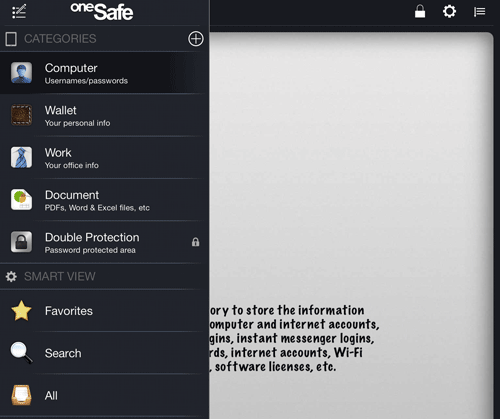
Active category name
![]()
Adding categories
New categories can be created to help organize your passwords.
Add a new category
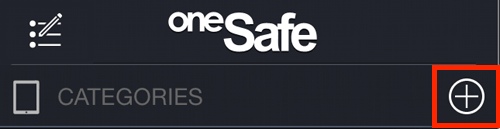
- Tap the Category list in the upper left corner.
- Tap Plus sign.
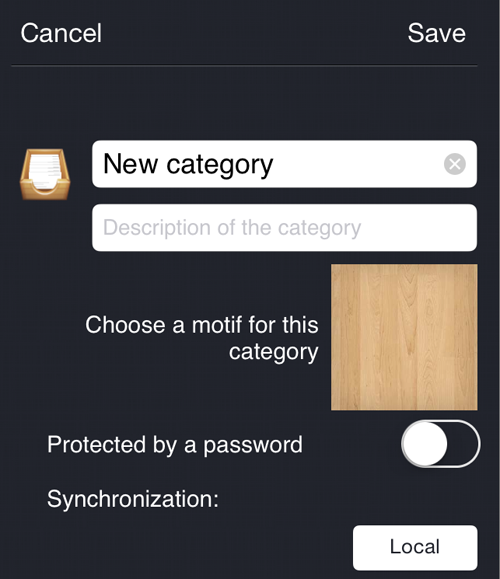
- Enter the name of the new category.
- Enter a description of the new category, if desired.
- Choose the motif for the new category.
- Choose whether to password-protect the category.
- Choose whether to synchronize.
- Tap Save.
GIVE IT A TRY!
- Add a new School category for passwords.
- Add a new Misc. category for passwords.
- Add a new helpful category for the types of passwords you need to remember.
oneSafe Add Category icon
oneSafe Add New Category screen
Reordering categories
Categories can be rearranged to provide better organization.
Reorder oneSafe categories
- Tap the Edit Categories icon in upper left corner.
- Tap, hold, and drag the move icon (located on the right side of each category) to move that category to the new desired location.
GIVE IT A TRY!
- Move the School category created previously to the top of the categories list.
- Reorder the categories to put them in the most logical order for your needs. You can prioritize the categories and put the most frequently used category on top—or you may wish to alphabetize categories if that works for you.
- Tap Done.
Edit Categories icon
Edit Categories screen
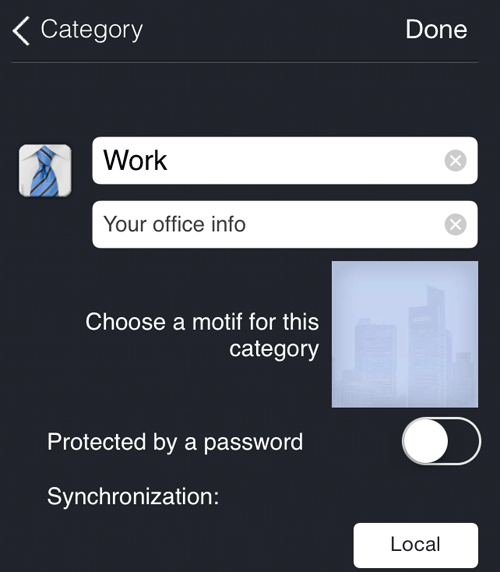
Editing category details
Category information can be edited, including renaming category titles to help clarify the types of passwords stored inside.
Edit an existing category
- Tap the Edit Categories icon in upper left corner.
- Tap the category to be edited.
- Edit the information for that category.
- Tap Done.
GIVE IT A TRY!
- Rename the School category to College.
oneSafe Edit Category screen
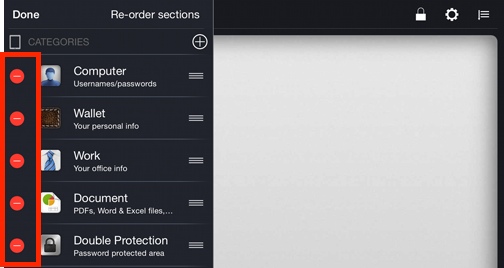
Deleting categories
There are two ways to delete a category:
Delete oneSafe categories from the Edit Categories screen
- Tap the Edit Categories icon in upper left corner.
- Tap the red circle to the left of the category to be deleted.
- Tap Delete.
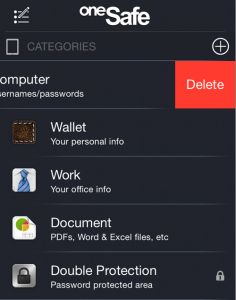
Delete oneSafe categories from the Categories screen
- Tap to the right of the category and drag to the left.
- Tap Delete.
GIVE IT A TRY!
- Delete at least one of the new categories previously entered in this lesson.
Delete categories from Edit Categories screen
Delete categories from Categories screen